Train basics
This page will introduce the basic concepts which you will need to be familiar with to pilot trains in Metrostroi. It will explain the basic mechanics and safety systems at play, as well as start-up procedures from both "Cold and Dark" and "Fully started" states, and how to control the train.
This guide is written primarily for the 81-717. Most controls and systems in the 81-717 are common across the whole 81 series.
If you are unfamiliar with the operation of metro/subway trains in general, particularly those in eastern Europe, it is recommended to read this page in its entirety. However, if you are wanting to get started quickly, you can skip to here.
Control Panel
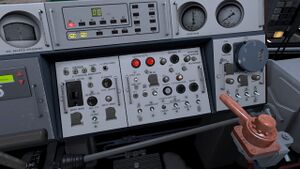
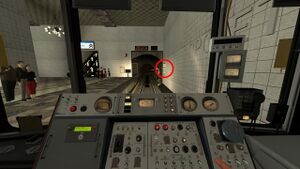
The control panel is the main board of switches and levers which sits in the cabins at either end of the train. The control panel contains the controls for the train's systems.
You can view the name of any component on the control panel by moving your cursor over it while sat in the driver's seat. The purpose of some components is easy to infer from their names.
The basic components of the control panel which are needed to drive the 81-717 are explained below:
ARS and ALS
ARS and ALS are two very important systems present on the 81-717.
ARS, short for "Automatic Regulation (of) Speed", is a system that can intervene if the train is detected as overspeeding or passing a stop light. The ARS is responsible for preventing derailments and collisions.
ALS, short for "Automatic Locomotive Signalling", allows the train to communicate with the signal network. It can receive data on speed limits and the status of signals ahead. This information is displayed to the driver and is also fed to the ARS.
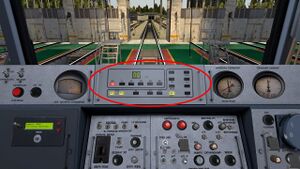
Together, ARS and ALS form the main safety systems on the 81-717. The relevant information regarding ARS/ALS is shown on the information display, which consists of a series of lights The most important ones are described below:
- If the ОЧ indicator is illuminated, there is no ARS signal and the train cannot provide automatic safety systems. In order to drive, the shunt mode should be activated and the attention pedal should be held at all times. The speed limit will be 20kph.
- The horizontal band of numbers, from 0 to 80, shows the current speed limit. Should the train exceed this limit, the train will automatically apply the brakes. If two lights are illuminated simultaneously, then the speed limit will decrease from the larger number to the smaller number soon and braking circuits should be assembled.
- The ЛКВД light will be illuminated if control is taken away from the driver by ARS/ALS, such as when overspeeding or passing a red light.
- The ЛСД lights will not be illuminated if the doors are opened. Driving with the doors open is not allowed; you should make sure the ЛСД lights are lit before assembling any power circuits.
- The РП and ЛСН lights will illuminate red if the power circuits cannot be assembled. This generally means that assembly of the power circuits has been disallowed for safety reasons.
- The train's current speed in kilometres per hour is shown in large digits (although this is sometimes a dial)
KV
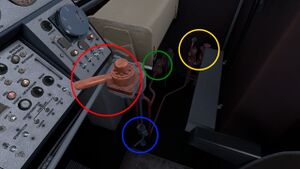
The KV, referred to in English as the Master Controller, is the main lever which you use to accelerate and decelerate the train. By pushing it forwards and backwards, you assemble different circuits which cause the traction motors to perform various degrees of acceleration and braking.
- Pushing the lever forwards by pressing W will engage the "X" power circuits (X is short for ход meaning movement). Each step forwards will assemble the circuits X1, X2 and X3, where the higher number denotes a more powerful acceleration. The power circuits can also be assembled using the number keys 1 through 3.
- Pulling the lever backwards by pressing S will engage the "T" braking circuits (T is short for тормоз meaning brakes). Each step backwards will assemble the circuits T1, T1A and T2, where the higher number denotes more powerful braking. The braking circuits can also be assembled using the number keys 5 through 7.
- Moving the lever to the central "neutral" position by pressing the number key 4 will disassemble all circuits. If the train is moving, it will continue to roll under its own momentum, but will make no effort to speed up nor slow down.
All together, the KV has 7 positions to assemble 6 different circuits: T2, T1A, T1, neutral, X1, X2 and X3.
When moving the KV and assembling different circuits, there is a small delay between when the KV arrives at a circuit's position and when the circuit finishes assembling. It is important to accommodate for this delay and plan your actions ahead.
Driver's Valve
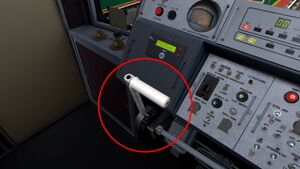
The Driver's Valve controls the pneumatic brakes on the 81-717. It must be connected by pulling the blue lever beneath the large red handle to the upward position, either by physically clicking on it or by pressing left-shift and L simultaneously. Once it is connected, the lever can be moved forwards and backwards using the R and F keys.
Moving the driver's valve handle will change the amount of pressure stored in the brake line. When the handle is pulled using the F key, pressure will be moved from the brake line to the brakes. Lower pressure in the brake line means the brakes are being applied harder.
- When the driver's valve handle is pushed all the way forwards with the R key, the pneumatic brake is released and the brake line is pressurised to 5.0 atmospheres.
- Each notch the lever is pulled using the F key, the pressure in the brake line will be reduced over 4 steps down to 3 atmospheres, the maximum normal brake effort.
- If the lever is pulled further, all of the pressure in the brake line will be released and the brakes will be fully applied. This is known as the "emergency application" and, as the name suggests, should only be done in an emergency as the braking force is very strong and may cause passenger discomfort.
Braking using the driver's valve is not always necessary.
Attention Pedal
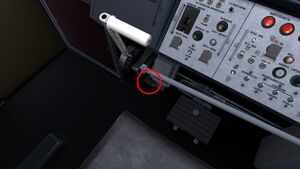
The attention pedal is a foot pedal to the left-hand side of the driver's seat. When moving the train in circumstances where ARS/ALS is not available, such as at the depot or in emergencies, the attention pedal must be pressed at all times. This is so that, if the driver is incapacitated for any reason, the pedal will be released by the unconscious or absent driver and the brakes will be applied. That way, the absence of ARS/ALS does not pose a safety risk.
The attention pedal is pressed by holding the space bar.
Other switches
The central portion of the control panel in the 81-717 contains various buttons and switches for controlling systems such as doors and lighting. You can see the purpose of each control by hovering over it with the cursor. Most important controls here have hotkeys:
- G: Presses "ВОСВРАТ РП" (reset RP) to reset the overload relay and enable the brake valve
- A: Sets the doors side selector switch to "ЛЕВЫЕ" (left) and presses the "ДВЕРИ ЛЕВЫЕ" (left doors) button to open the doors on the left-hand side of the train.
- D: Sets the doors side selector switch to "ПРАВЫЕ" (right) and presses the "ДВЕРИ ПРАВЫЕ" (right doors) button to open the doors on the right-hand side of the train.
- V: Toggles the "ЗАКРЫТИЕ ДВЕРЕЙ" switch which, when in the downward position, will close any open doors.
- L: Blows the horn
Starting the train
Because of the depth of the accuracy of Metrostroi's simulation of trains, the 81-717 can be started either from cold or from a powered-on standstill, depending on the user's preferences. The user can choose if they would like the train to be started from cold or from a powered state when spawning it in.
Starting from cold
- Spawn an "81-717 Moscow Head" train in "cold and dark" state.
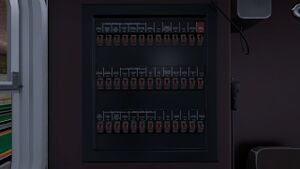
- Go to the switchboard in both cabins and turn on switches A49, A53 and AP-63
- Turn on the battery power in both cabins, the battery controls are below the switchboard
- Walking along the exterior on each side of the train, pull up every "main switch" you find (possibly unnecessary)
- Go in the rear cabin and enable the ALS, Cabin lighting, Passenger Compartment lighting and the headlights, Open the EPK valve.
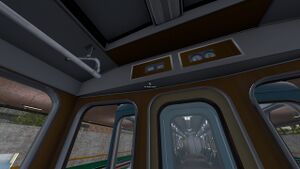
- Turn on the battery power in the intermediate wagons using the switches located under the power gauges above the door at the end of the wagon. Do so by pressing E on the door, looking to the keyhole in the ceiling and clicking on it
- Sit in the front driver's seat and insert the reverser key by pressing SHIFT+0, then set it to the forwards position by pressing 0. Test the doors with A and D, then close them with V. (press CTRL to toggle external view and move the mouse to switch sides)
- Enable ARS and ALS, open the driver's valve disconnect (shift + L) and the EPK, hold the attention pedal with the space bar
- Enable the Low Frequency Amplifier Switch, the sound in cabin switch and the Announcer
- Enable the Lighting, Cabin lighting, Passenger Compartment Lighting and headlights, including the dim/bright ones
- Customize the radio announcer (this depends on the server/map you are in and is not completely necessary)
- Go to the front of the train and set the destination board and line numbers
- If you're at the depot, connect the power cable on the right-hand side of the train to the third rail pickup on either bogey of the second wagon, then turn on the depot power for your line using the lever by the door
- Return to the driver's seat and hold the attention pedal to stop the ARS/ALS warning siren if it is sounding
- Ask the dispatcher to allow your departure. If there is no dispatcher online, you can allow your own departure by looking under the signals and using the !sopen command.
- Proceed to drive. If you are at the depot, assemble X1 until the front of the train is over the third rail. Then stop the train, turn off the power cable and disconnect it from the bogey before continuing to drive.
Starting from powered-up state
- Sit in the front driver's seat and insert the reverser key by pressing SHIFT+0, then set it to the forwards position by pressing 0. Test the doors with A and D, then close them with V. (press CTRL to toggle external view and move the mouse to switch sides)
- Connect the drivers valve by pressing shift + L then move it to position 1 by pressing R
- Enable the Lighting, Cabin lighting, Passenger Compartment Lighting and headlights, including the dim/bright ones
- Customize the radio announcer (this depends on the server/map you are in and is not completely necessary)
- Go to the front of the train and set the destination board and line numbers
- If you're at the depot, connect the power cable on the right-hand side of the train to the third rail pickup on either bogey of the second wagon, then turn on the depot power for your line using the lever by the door
- Return to the driver's seat and hold the attention pedal to stop the ARS/ALS warning siren if it is sounding
- Reset the AP/BV by pressing G
- Ask the dispatcher to allow your departure. If there is no dispatcher online, you can allow your own departure by looking under the signals and using the !sopen command.
- Proceed to drive
Driving the train
When driving the train, you must obey all signals and signs that you see. Most importantly, you should never pass any red or flashing red signals.
You should pay attention to the purposes of the different circuits you use when driving:
- X1, the first notch forwards on the master controller, is used for shunting and depot movements. It is the slowest power circuit.
- X2 and X3, the second and third notches forwards on the master controller, are used for transit between stations (normal driving)
- T1, the first notch backwards on the master controller, will decelerate the train with medium braking force to 30kph where it will continue to decelerate with light braking force.
- T1A, the second notch backwards on the master controller, will decelerate the train with medium braking force at all speeds.
- T2, the third notch backwards on the master controller, will decelerate the train with maximum braking force.
When arriving at stations, you should assemble T1 as you approach then use T1A and T2 to stop at the black and white marker. Overshooting the end of the platform will cause delays and considerable inconvenience for the passengers, so you should approach stations carefully. This is especially important at stations with platform screen doors.
